
Verify your sending domain on Hodhod
Verify your sending domain on Hodhod
Hello — you can send newsletters from your own domain email address when it uses a custom domain, not a generic inbox like Gmail or Yahoo.
Follow these steps to connect your domain to Hodhod.
Step 1: Open domain settings
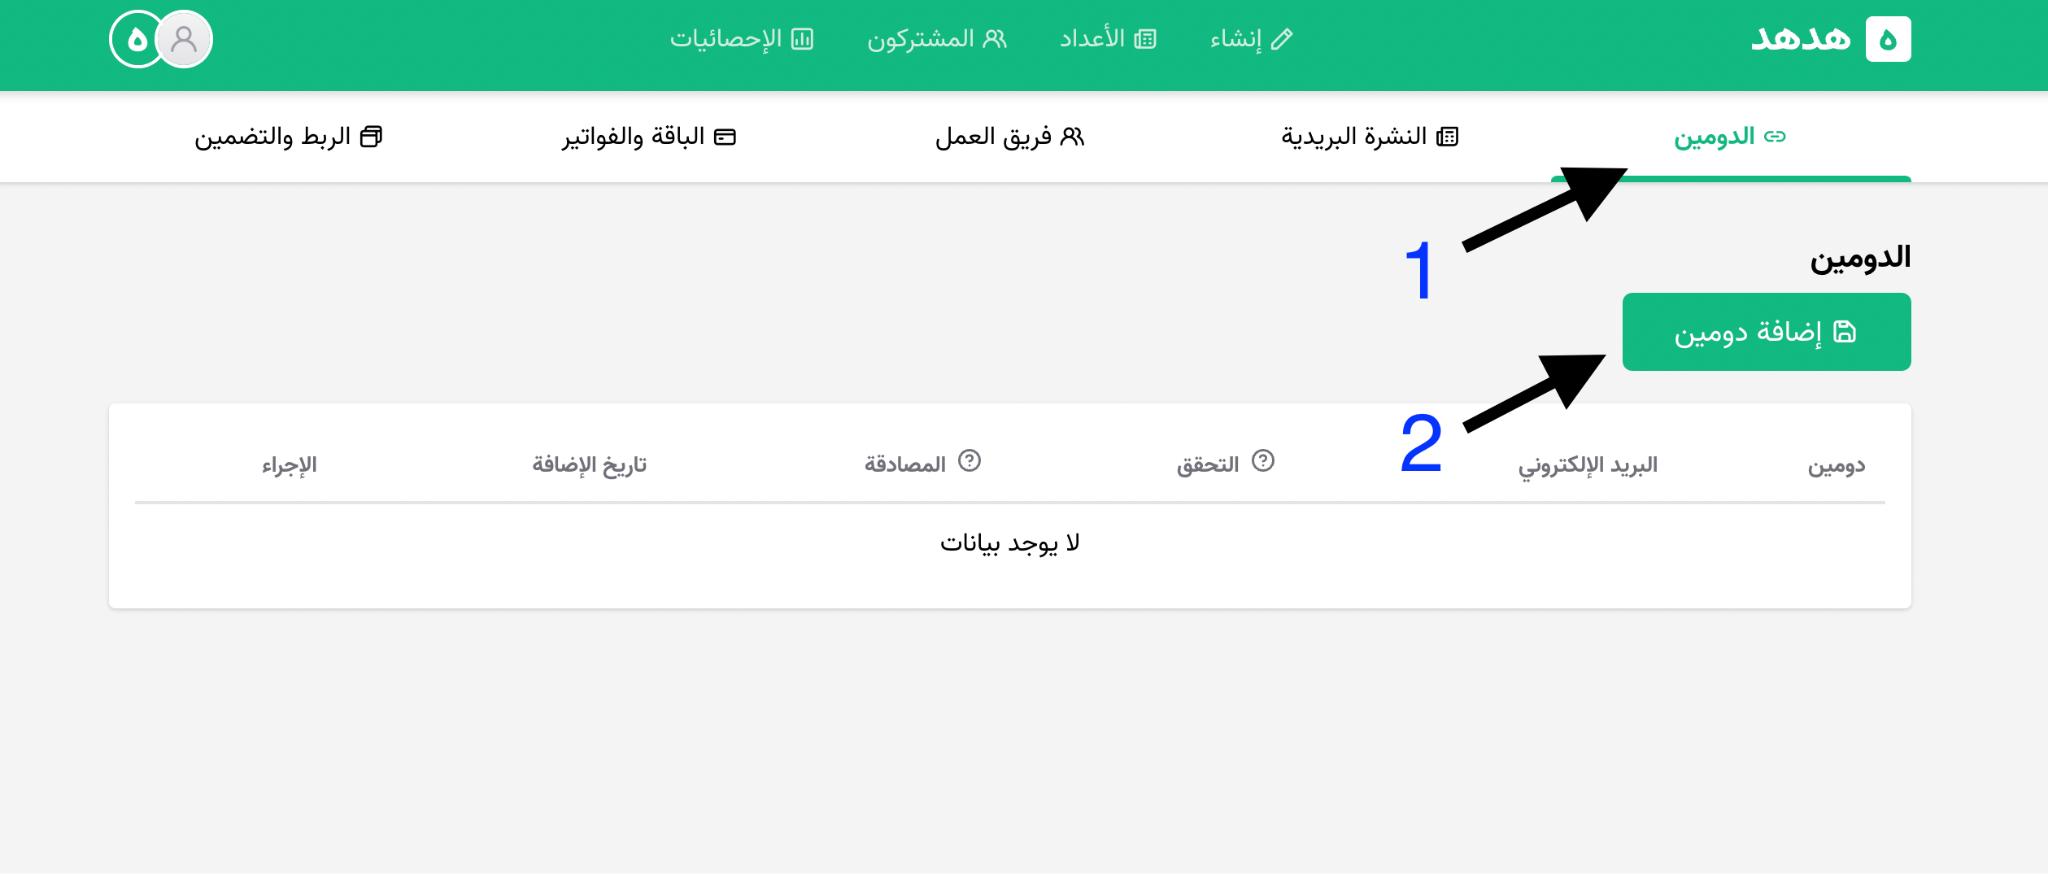
- Log in to Hodhod, then open your newsletter settings.
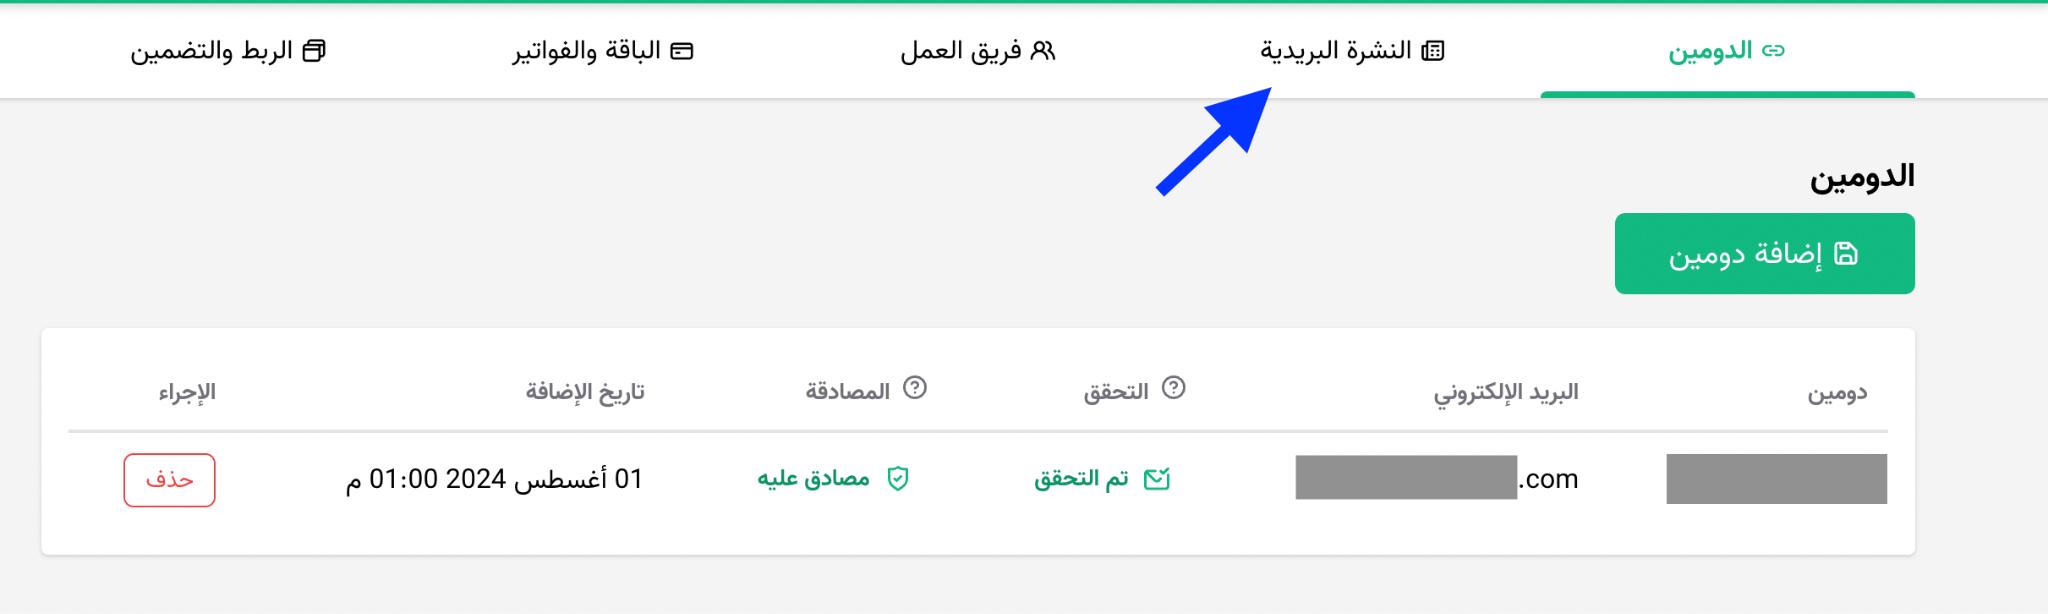
- In the top navigation, choose “Domain”.
Step 2: Add a new domain
- Click “Add domain”.
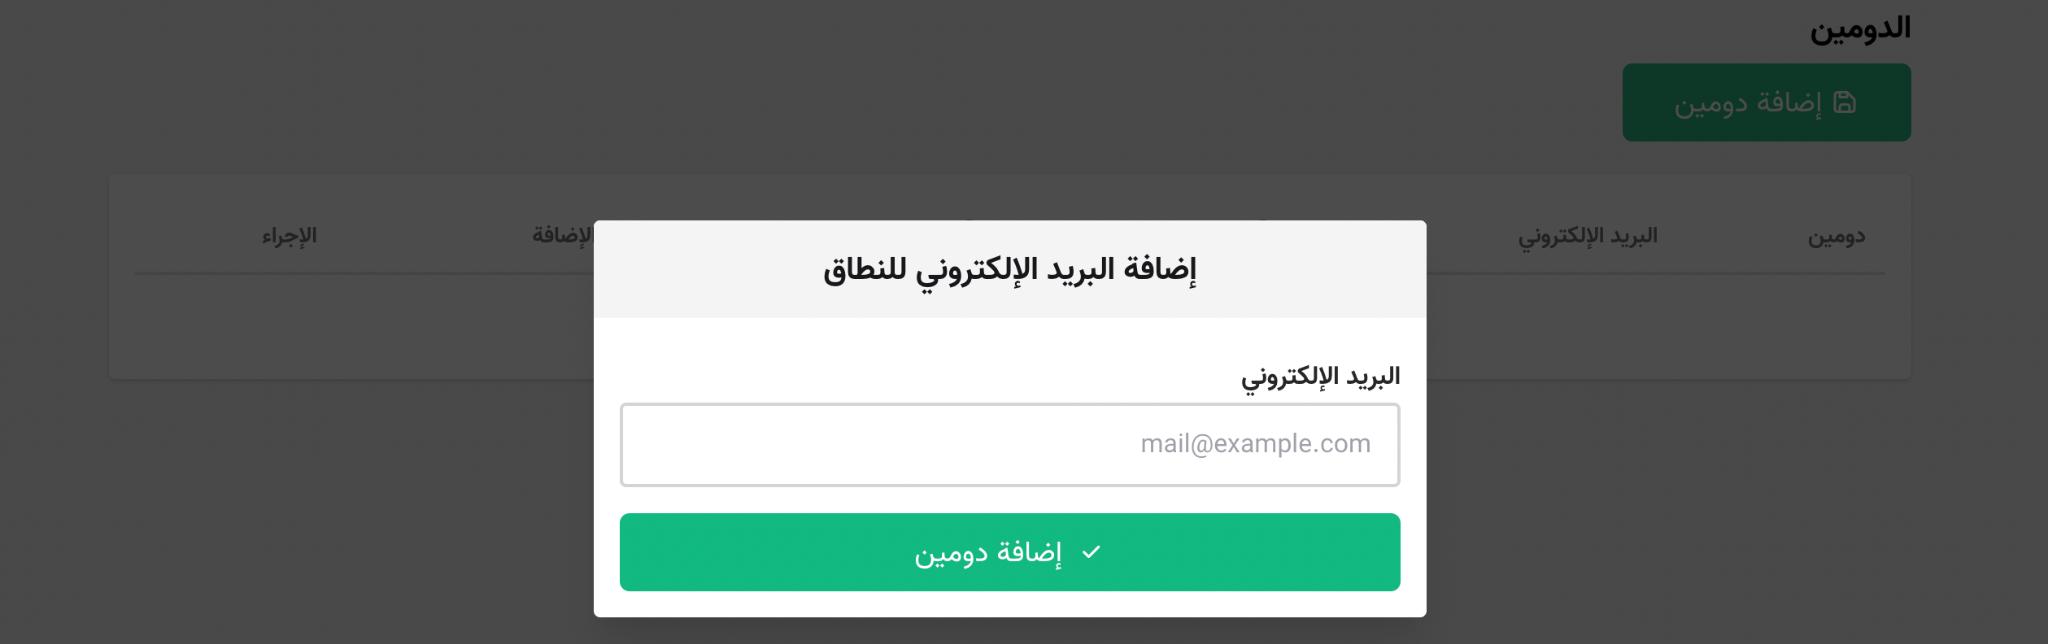
- In the dialog, enter the email address on your domain.
- Click “Add domain” again to finish.
Step 3: Email verification
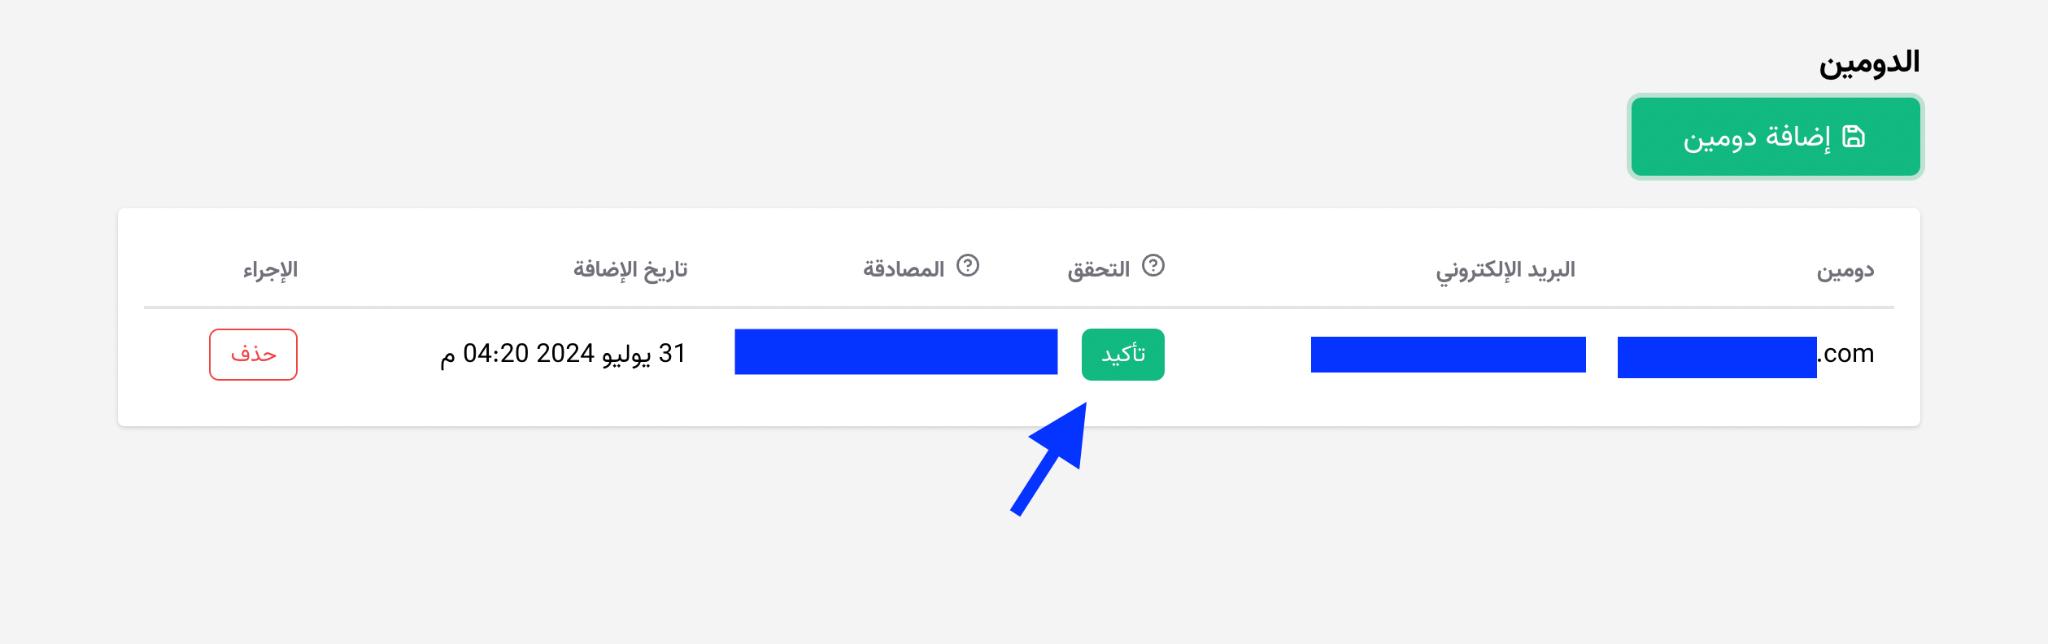
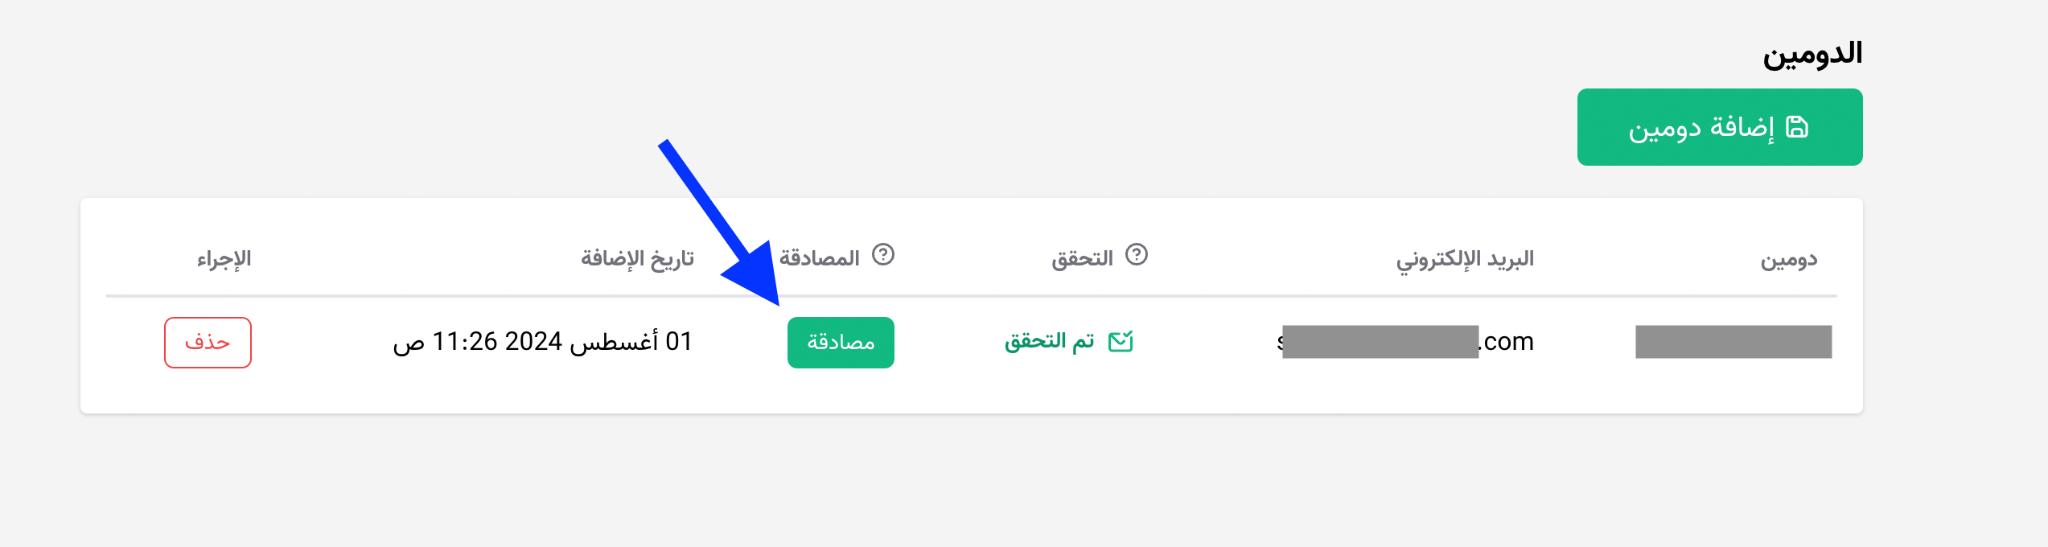
- After you add the address, you will see domain details with verification and authentication status.
- Click “Confirm” to start verification.
Step 4: Confirm from your inbox
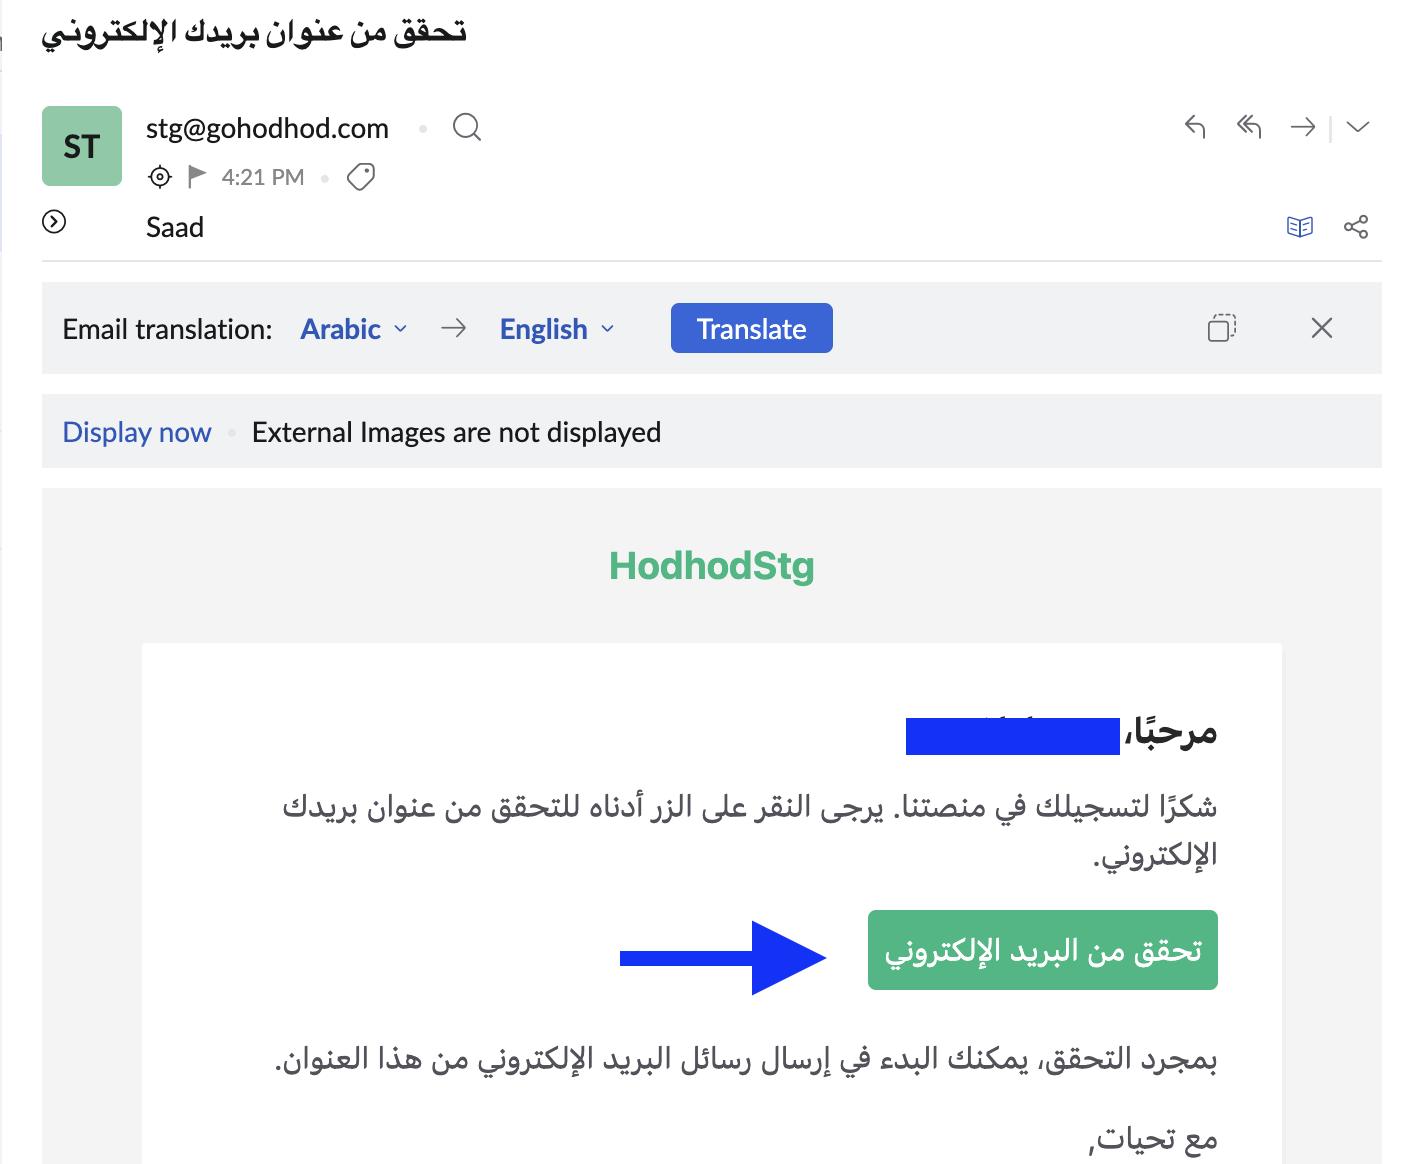
- Open the inbox you used when adding the domain.
- Find Hodhod’s verification email.
- Open it and click “Verify email address”.
Step 5: Add DNS records
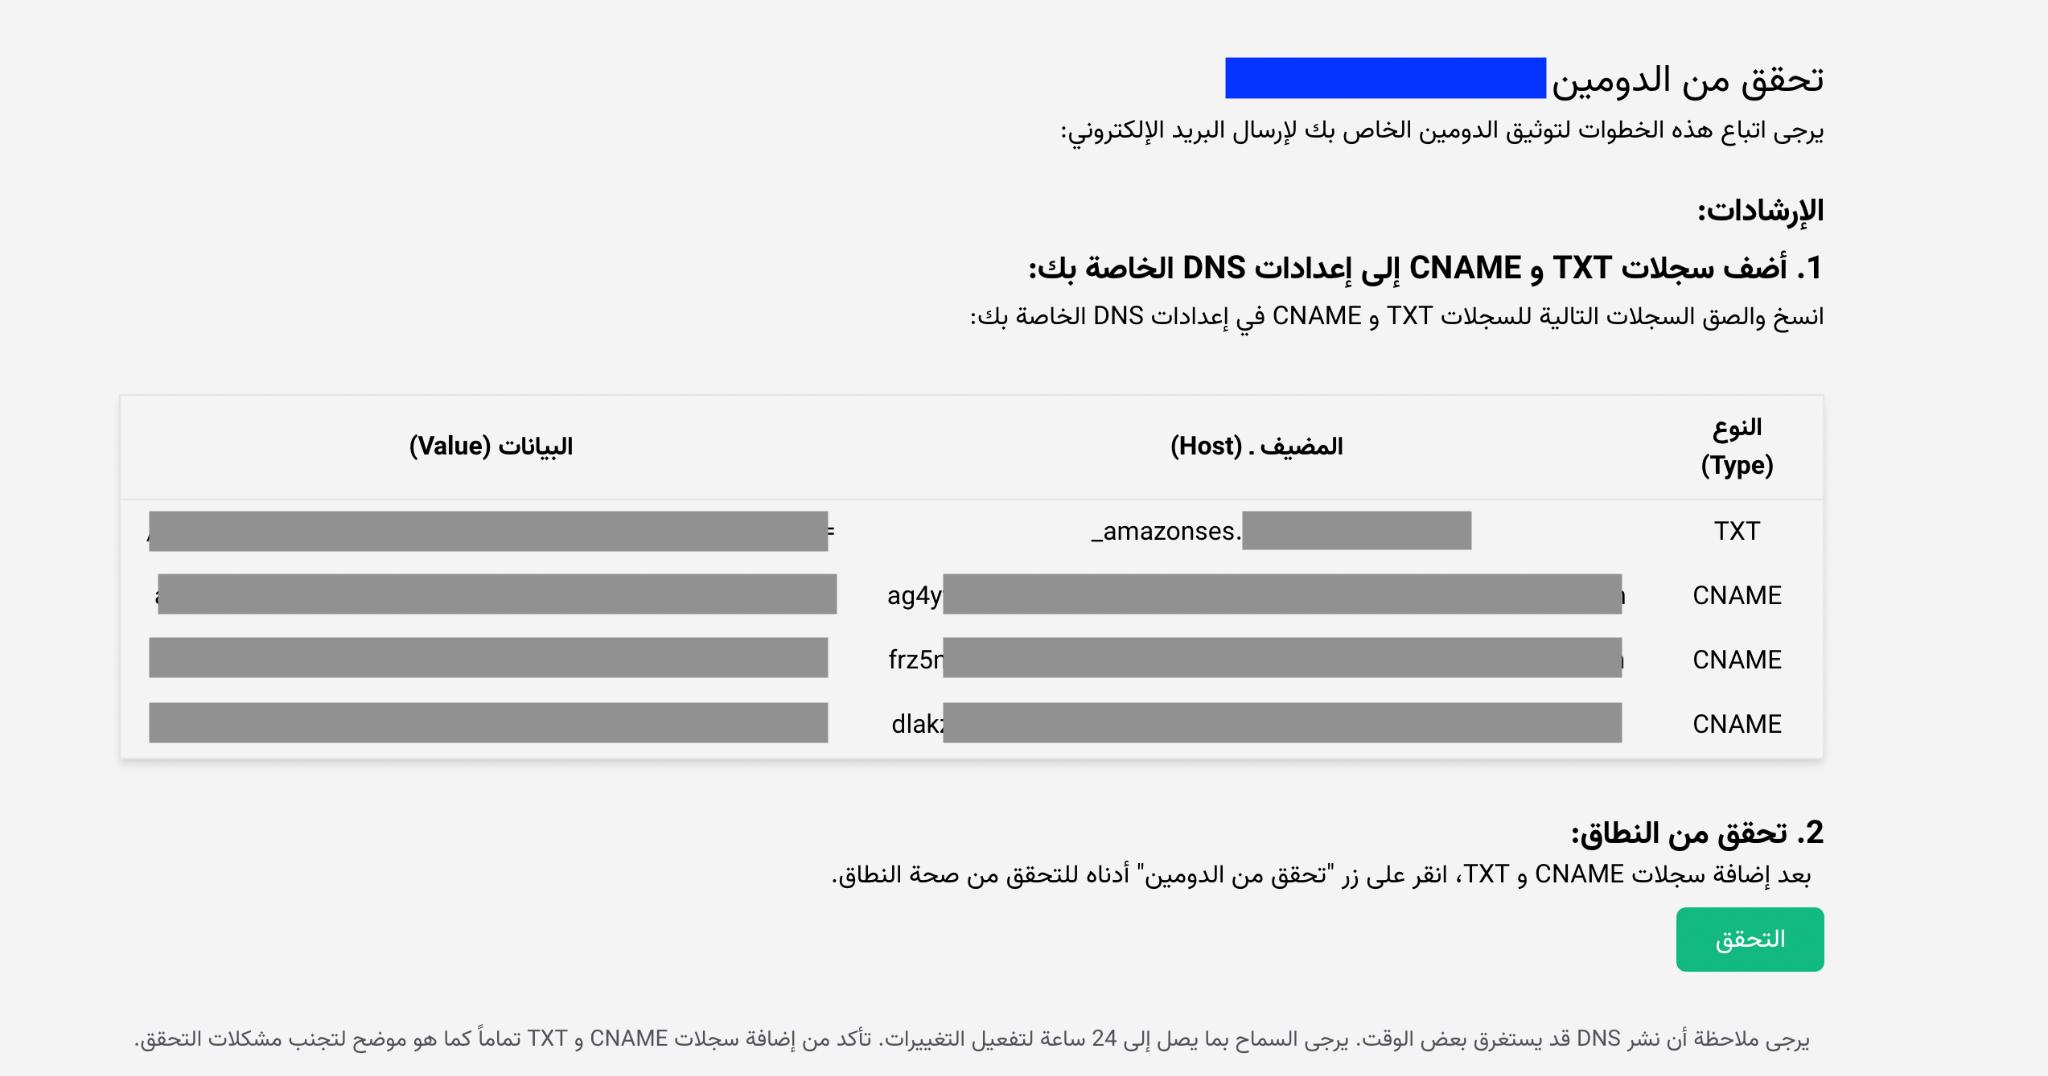
- After the domain is confirmed, add the TXT/CNAME records shown in Hodhod to your DNS. Click “Authenticate” on the domain page to view the records.
- After clicking “Authenticate”, you will see the exact DNS values to add.
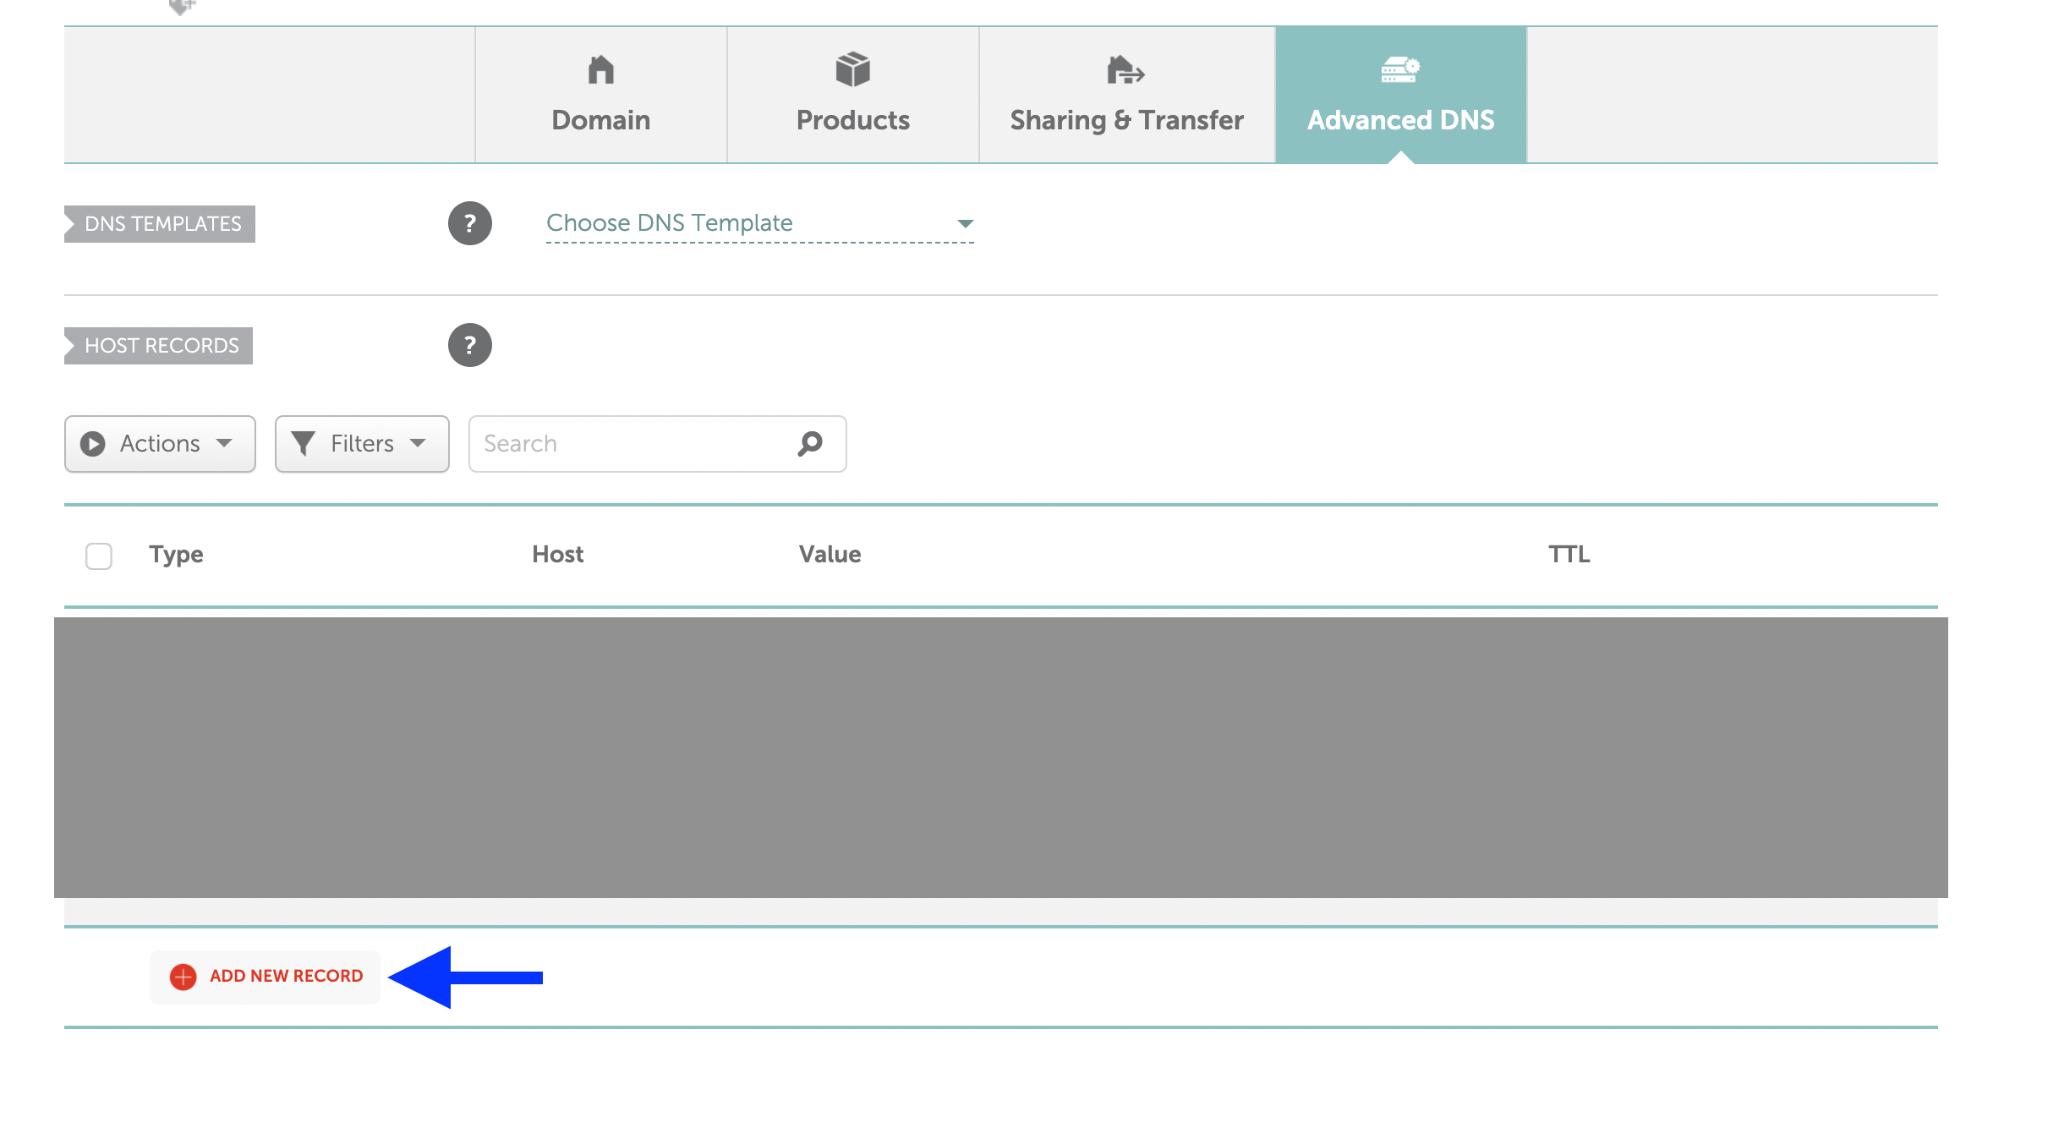
- Open DNS settings at your registrar or DNS host (Namecheap is shown as an example).
- Click “ADD NEW RECORD” as in the screenshot, choose TXT or CNAME, and add every record Hodhod lists.
- Enter the host and value fields exactly as Hodhod shows.
Step 6: Validate DNS propagation
- After saving DNS, wait a few minutes for changes to propagate (it can take up to 24 hours).
- Return to the domain page in Hodhod and click “Verify domain”.
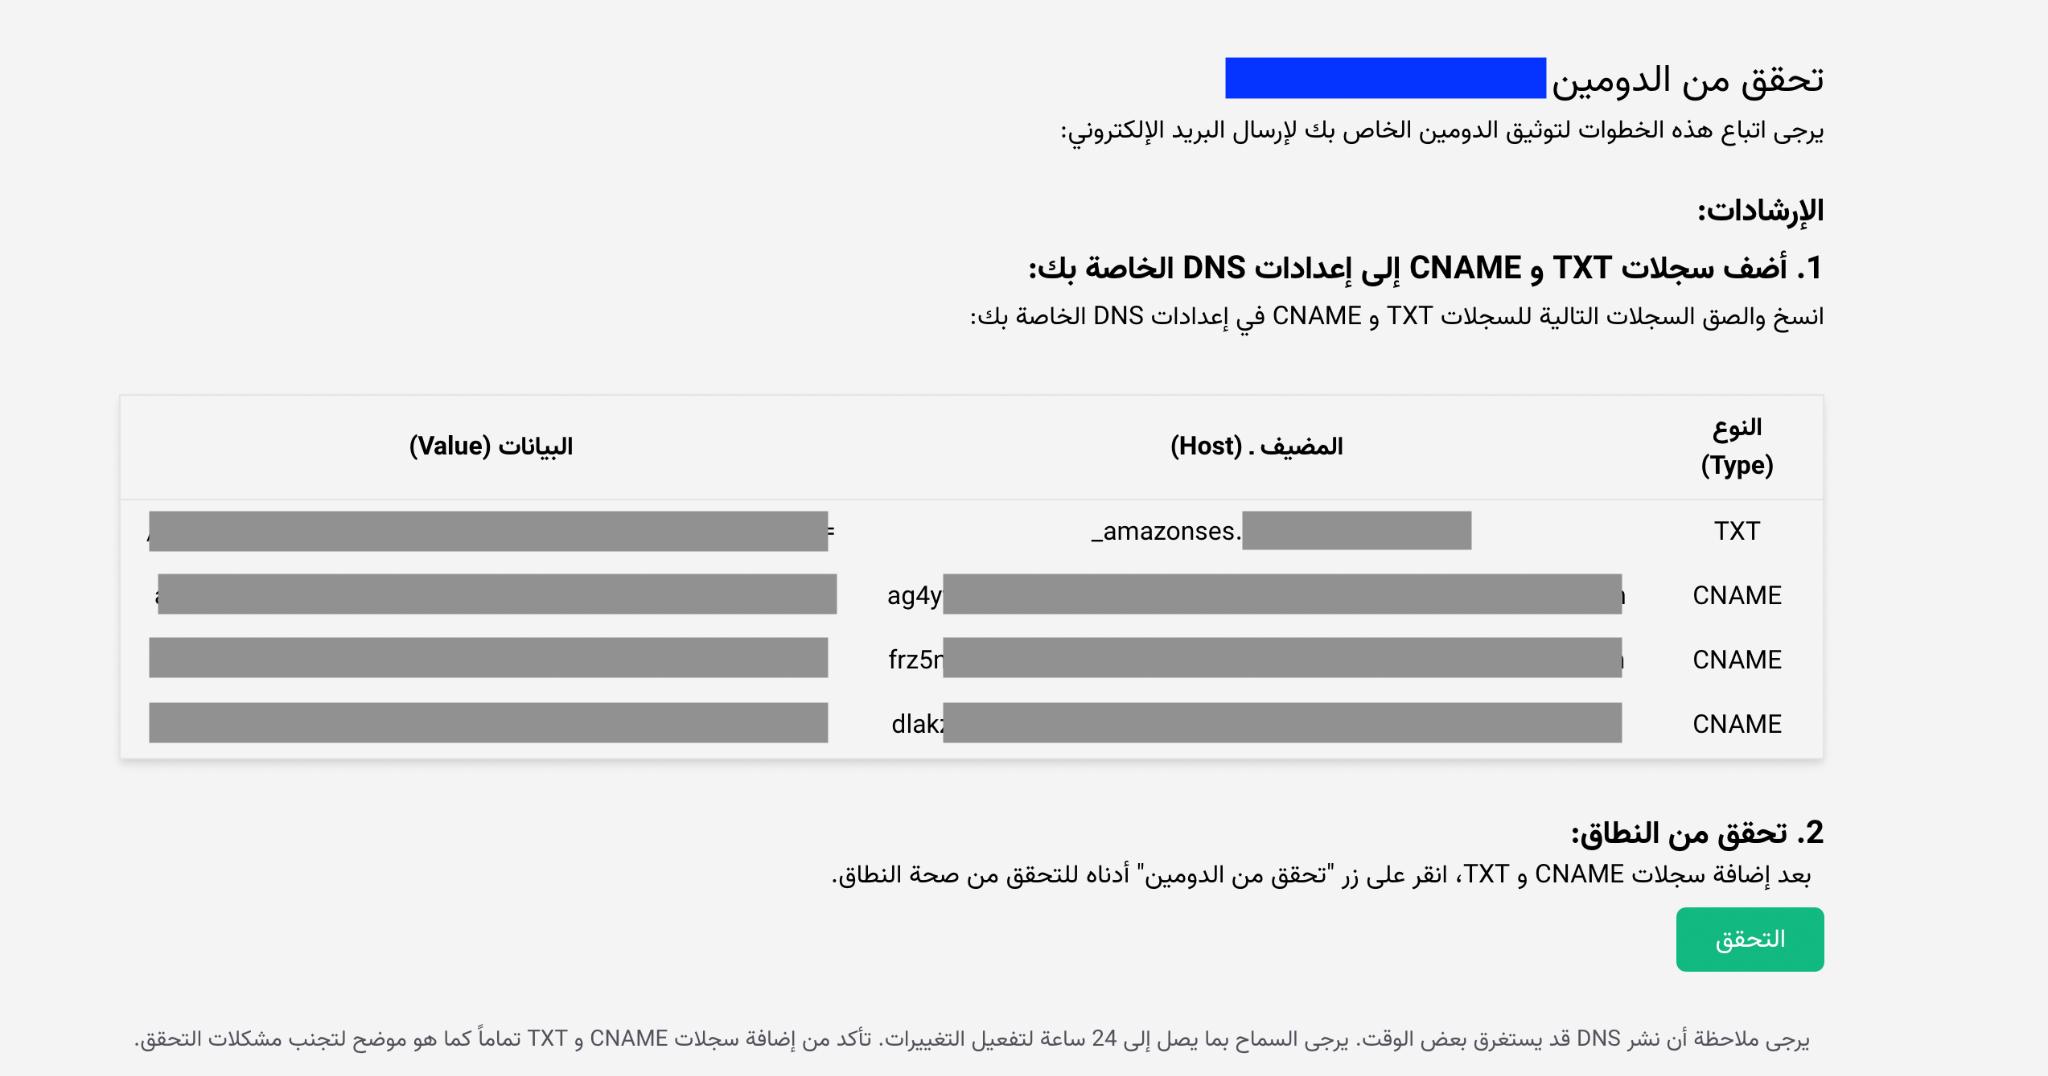
Values must match Hodhod exactly. Some providers (for example Namecheap) may auto-fill hostnames. If verification fails, edit the TXT record’s host field—e.g. use amazonses. instead of amazonses.www.example.com when Hodhod expects the shorter host.
Step 7: Enable business email sending
- Once verification and authentication succeed, open “Newsletter” from the top navigation.
- Enable “Use business email?”.
- Enter your sending address.
- Enter your reply-to address.
- Click “Save”.
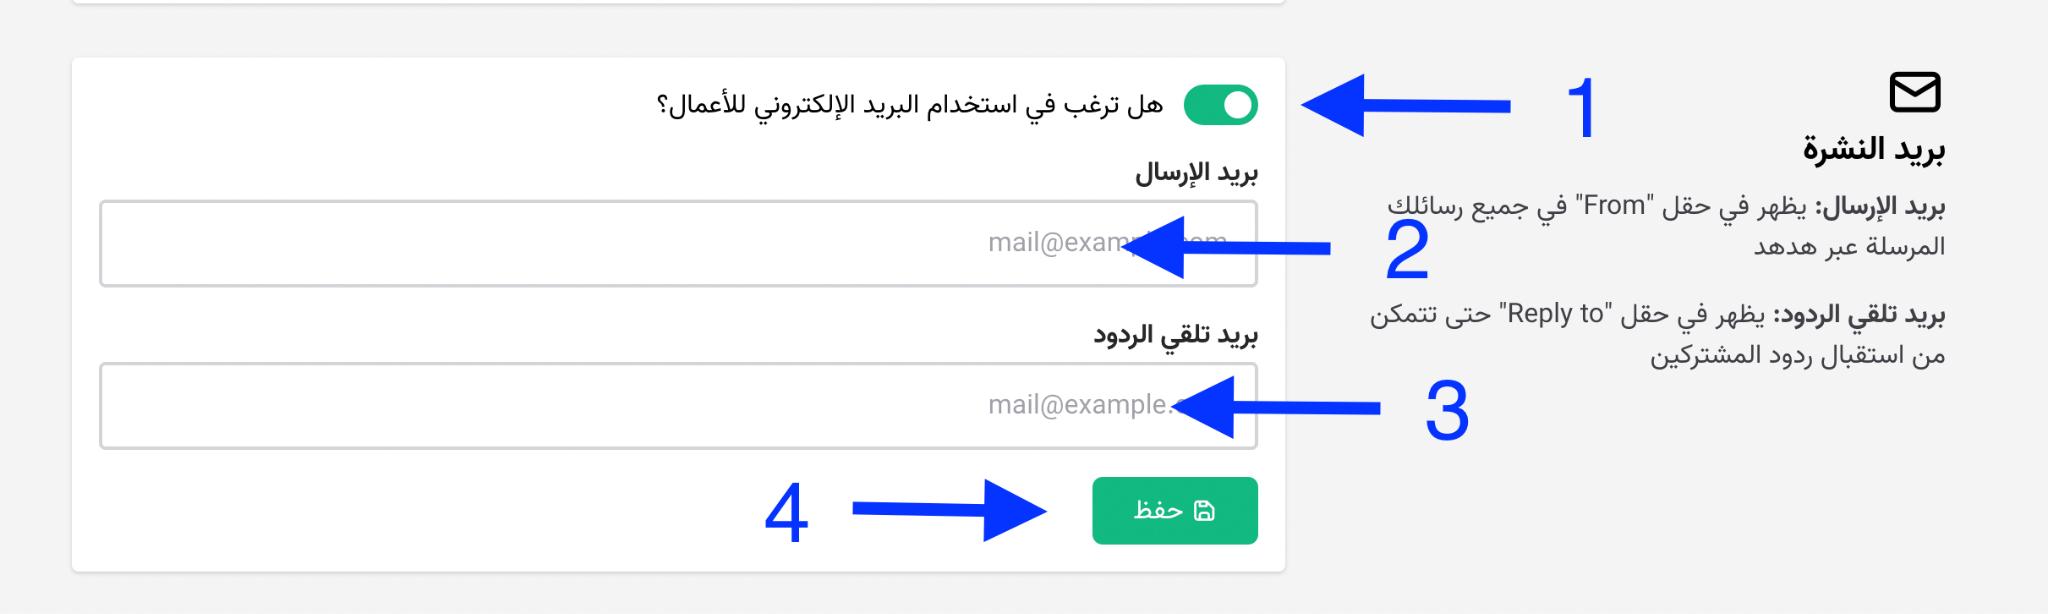
The sending and reply-to addresses must match the mailbox you already verified. To send from another address on the same domain, verify that mailbox first—Hodhod will show the steps if the address differs.
After these steps you can send newsletters from your domain on Hodhod.